Targeting
Introduction
Targeting allows to define the variation in the page content for different users. You can target content based on attributes such as whether customers have purchased from a specific collection, their current product page, or if they have a product with a specific tag in their cart
Targeting can be based on various criteria, including:
- Device Type (mobile, desktop, tablet)
- URL Parameters
- User agent strings & more.
Note - Subscription is required for other than URL based targeting.
Process
- Create a New Entry as a page.
- Open the page in builder io visual editor.
- Click the Targeting icon from the top right toolbar.

- Add new target based on URL path or Devices & add the relevant value.
- Finally, publish the page to see the update.
Note- When using SSR or SSG, and targeting by device such as mobile, tablet, or desktop you must reference the targeted device in userAttributes as in the following example:
userAttributes: {
    ...
  device: "mobile"
}
Using order with targeting
The order of content entries in Builder determines how Builder evaluates and determines which content entry to deliver. Builder starts at the top of the list of entries at the specified URL and works its way down to find the entry to render.
For example, when you have multiple pages set up as alternatives for a specific targeting condition, they all share the same URL. When a user requests that URL, Builder checks each page in the list associated with that URL, starting at the top. The first page that meets the specified targeting condition is the version that is displayed to the user.
Example
Consider three versions of a homepage; home, home 2, and home 3. Each has different content, but they are all at the same URL, as in the following:
- home 3, targeting mobile
- home 2, targeting desktop
- home (fallback), with no targeting

Here's how Builder determines which Page to deliver
- First, Builder considers all published Pages at the requested URL,
/. - If
home 3has the Device targeting attribute set to Mobile, and your user visitsyoursite.comfrom their phone, they get the content fromhome 3. - If
home 2targets Tablet, Builder delivers that Page to tablet users. - This example also has a fallback,
home (fallback), just in case. It's a best practice to be sure all your conditions have a fallback Page in case none of the conditions are met.
Targeting statement structure
When you configure targeting, you establish a condition about a user and then deliver the appropriate content to that user.
- Where
condition+operator+value
Built-in conditions are:
DeviceURL Path
Some examples of targeting statements are:
- Where
URLis/shoes - Where
deviceistablet
The operators available are:
ismeans equal to thevalueis notmeans not thevalue. Available for conditions with one possible value; for example, a Boolean.containsmeans theconditionincludes in it the string you specify for thevaluestartswith means theconditionbegins with the string you specify for thevalueends withmeans theconditionends with the string you specify for thevalue
Using Custom Targeting Attributes
You can set custom targeting attributes to conditionally render content based on complex criteria.
Setting up a custom targeting attribute
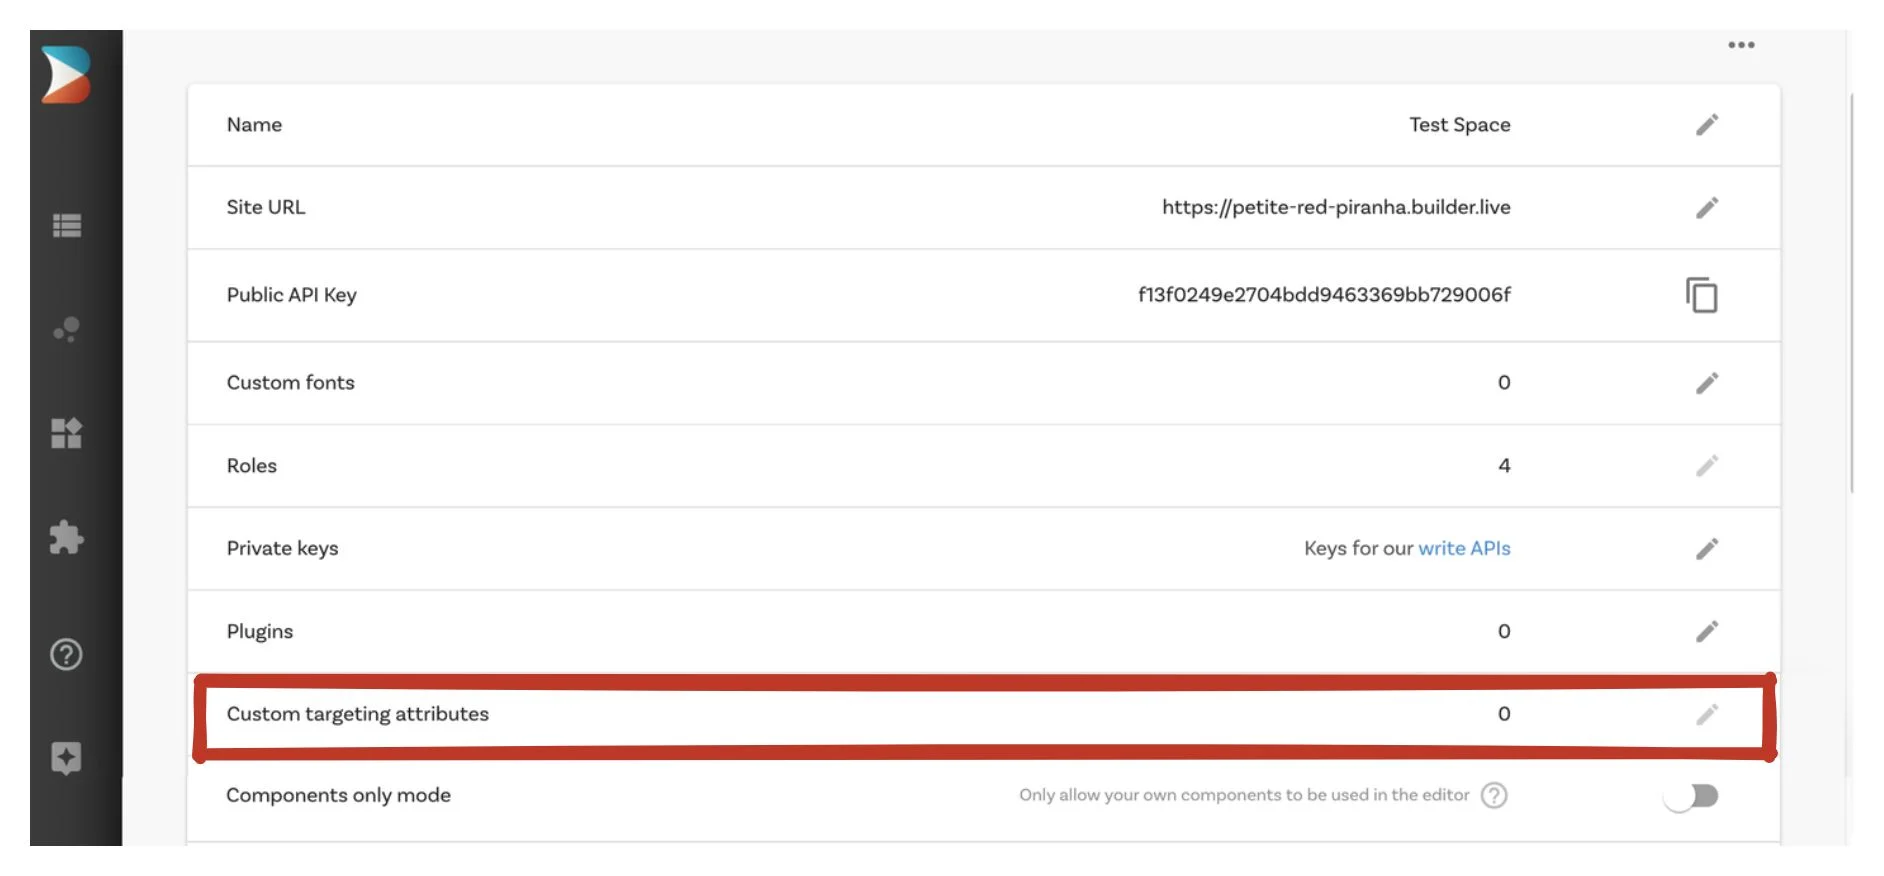
- From the Account page, click the Edit pencil for Custom targeting attributes.
- Click New target attribute
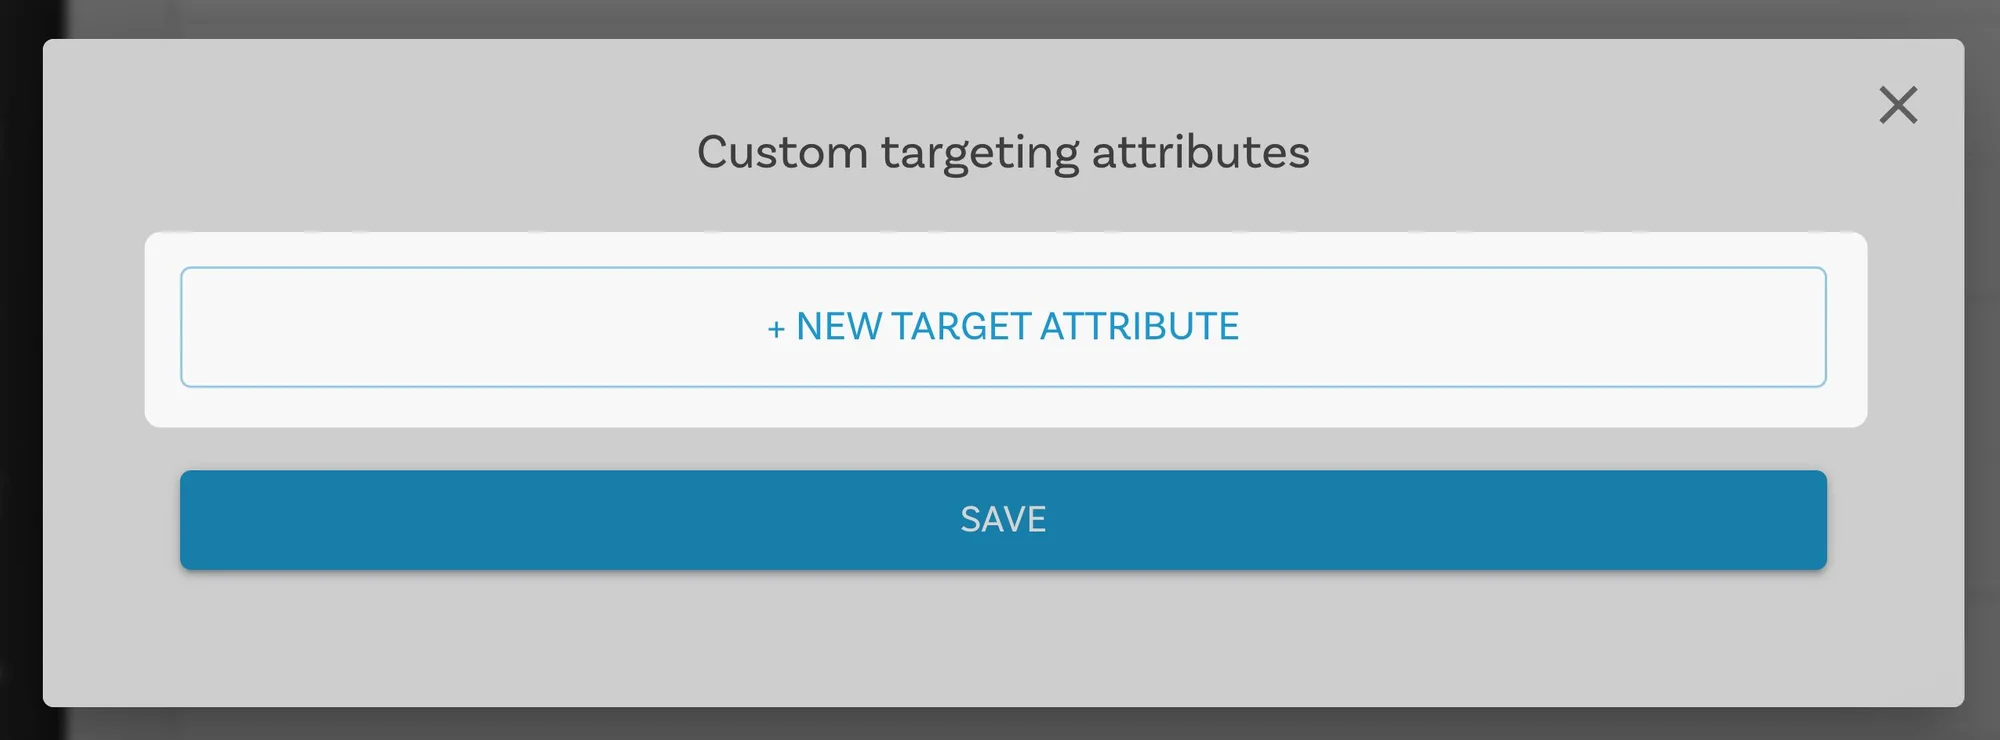
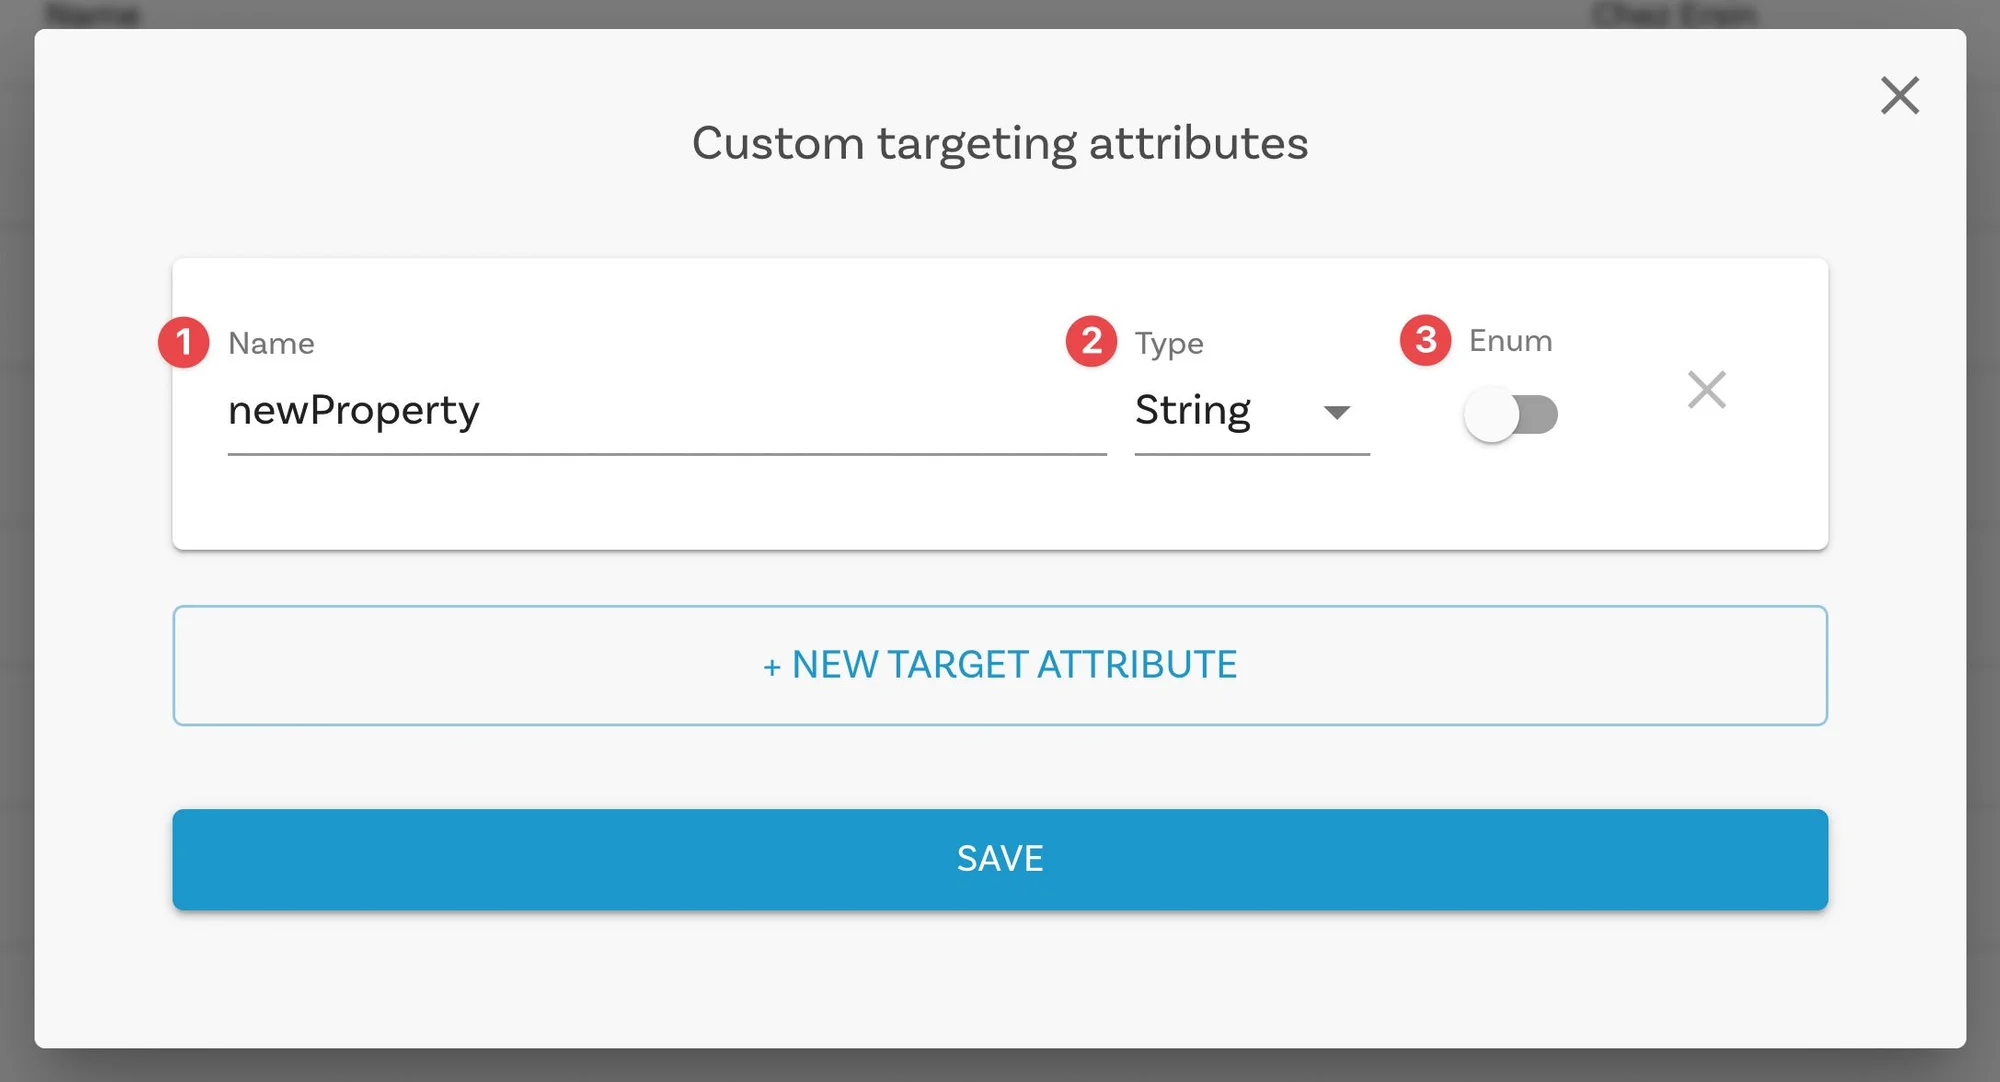
- Custom Targeting Attributes include:
Name: The name of your custom targeting attribute.
Type: Your attribute's type determines the editor UI that pops up when a user targets content using your attribute.
Enum (string type only): Restricts user input for the string type to a multiple-choice selection of strings.
- Click Save to create your new custom targeting attribute.
Targeting content with custom targeting attributes
You can target content with your custom targeting attributes by creating targeting conditions using those attributes.
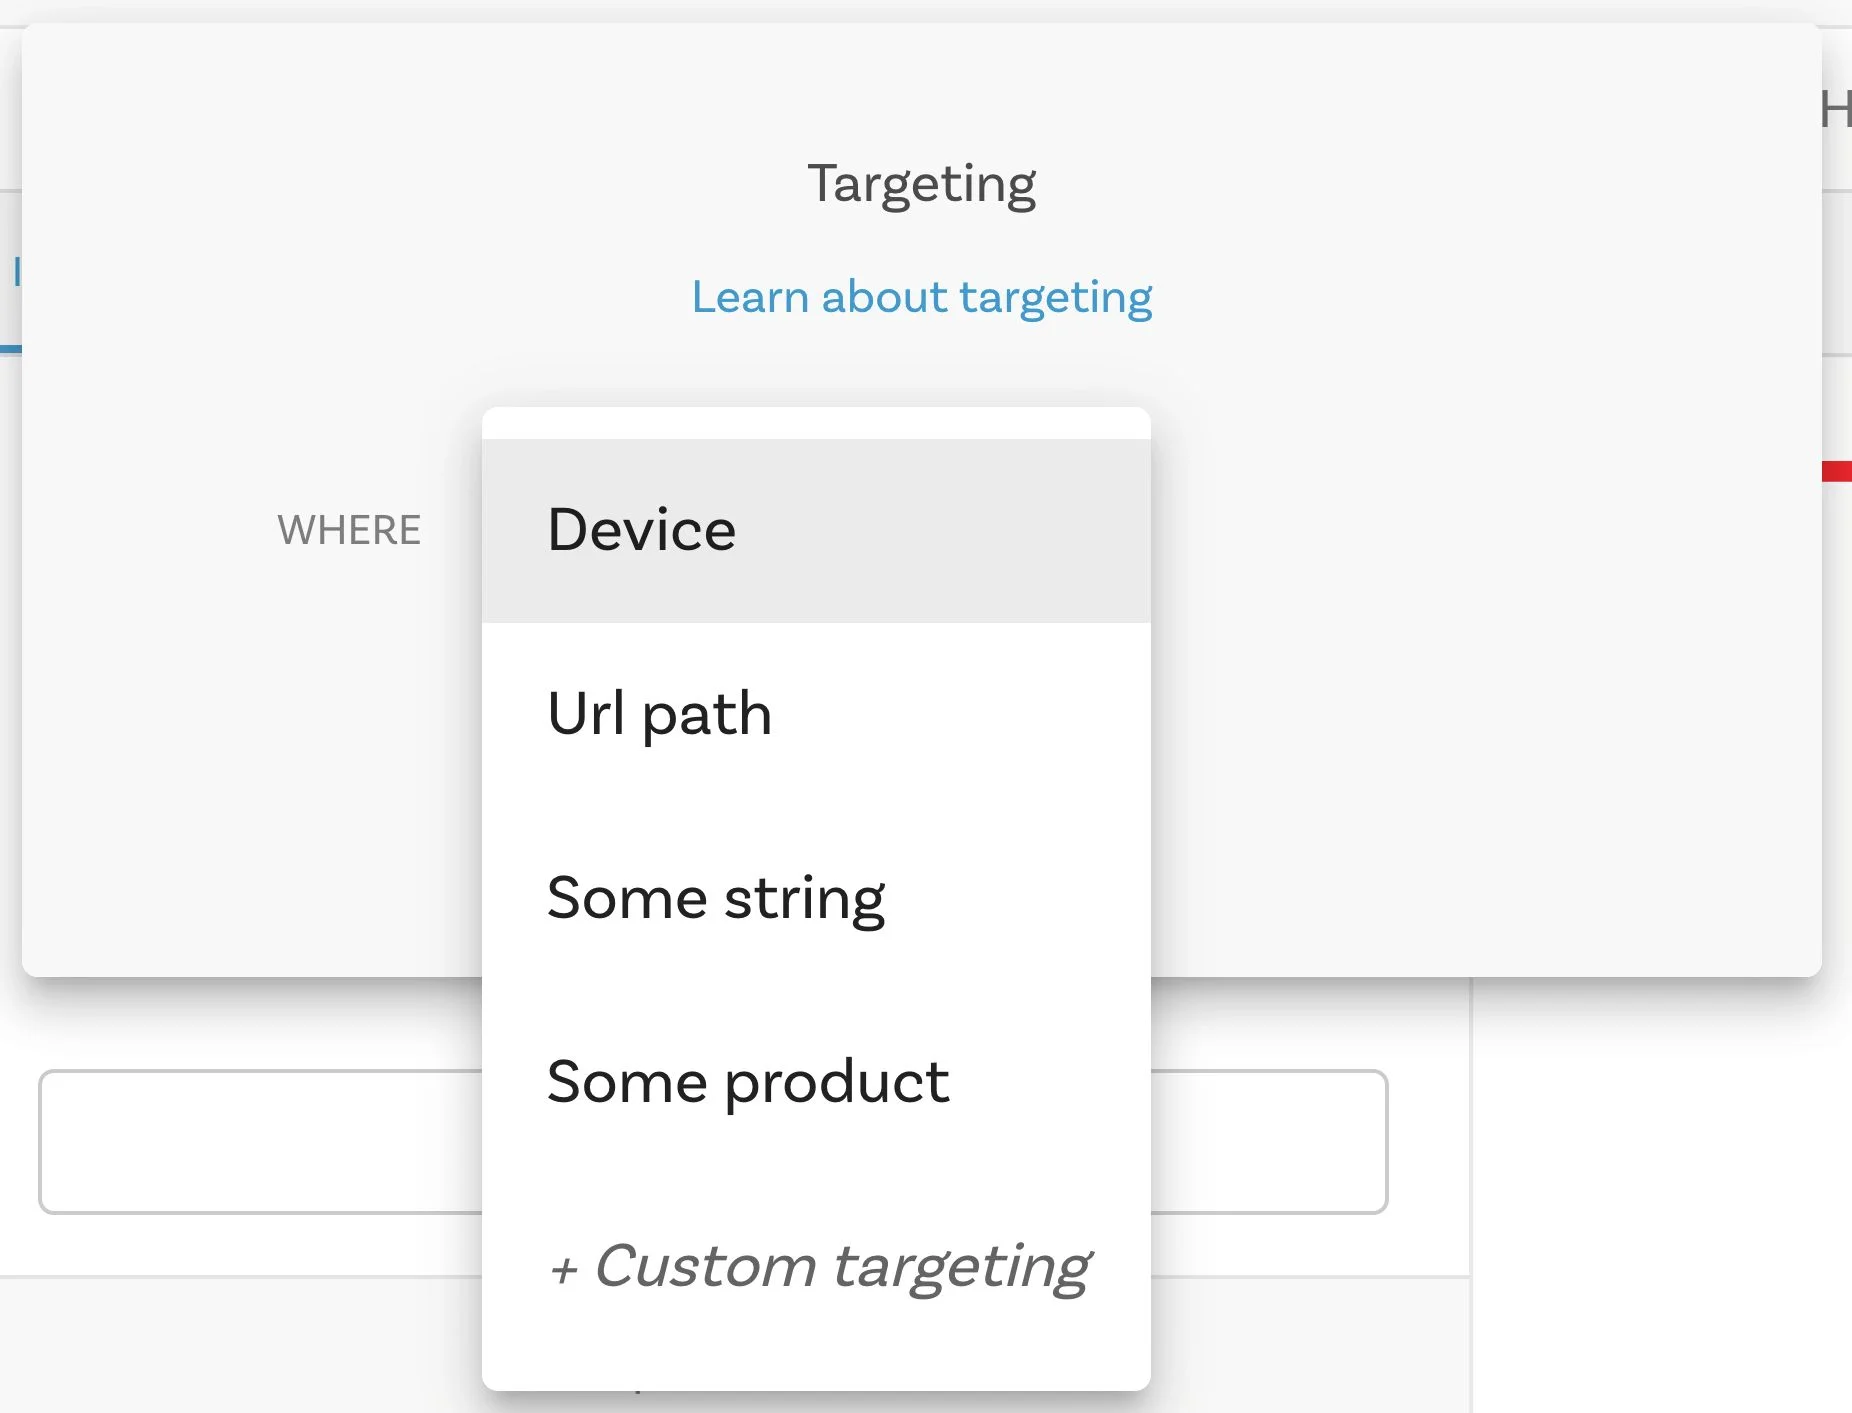
The process is the same as targeting with built-in attributes, the only difference is that your custom targeting attributes appear in the list of attributes to choose from when creating a targeting condition.
down below Some string and Some product are the custom targeting attributes.
Rendering targeted content with custom targeting attributes
When using custom targeting attributes, you can manually provide targeting data with your request either by using the JavaScript (JS) SDK or with query string parameters when requesting content using the content/GraphQL APIs.
For example, when requesting content that has a targeting condition named product that expects a product ID, you can set userAttributes when using the SDK:
const content = await builder.get('myTargetedContent', {
  userAttributes: { product: product.id }
}).promise();
Alternatively you can use setUserAttributes to set the targeting attributes once across multiple content requests:
builder.setUserAttributes({ product: product.id });

const content = await builder.get('myTargetedContent').promise();
const otherContent = await builder.get('myOtherTargetedContent').promise();
Finally, when requesting content directly from the content or GraphQL APIs, you can pass the targeting attributes using query strings:
const response = await $fetch(`https://cdn.builder.io/api/v2/content/my-model?apiKey=YOUR_API_KEY&userAttributes.product=${product.id}`)
If product.id matches the ID of the product selected for your targeting condition, then your content will be rendered.
Matching custom targeting attributes with custom types
In order to know what targeting data to send with a content API request, it's important to know how a targeting attribute's type editor stores a user's input as a value.
For example, the editor for the built-in string type is a simple text box. The value entered inside this text box when adding a targeting condition is the value that must match the targeting data sent with your content API request for your content to be rendered.
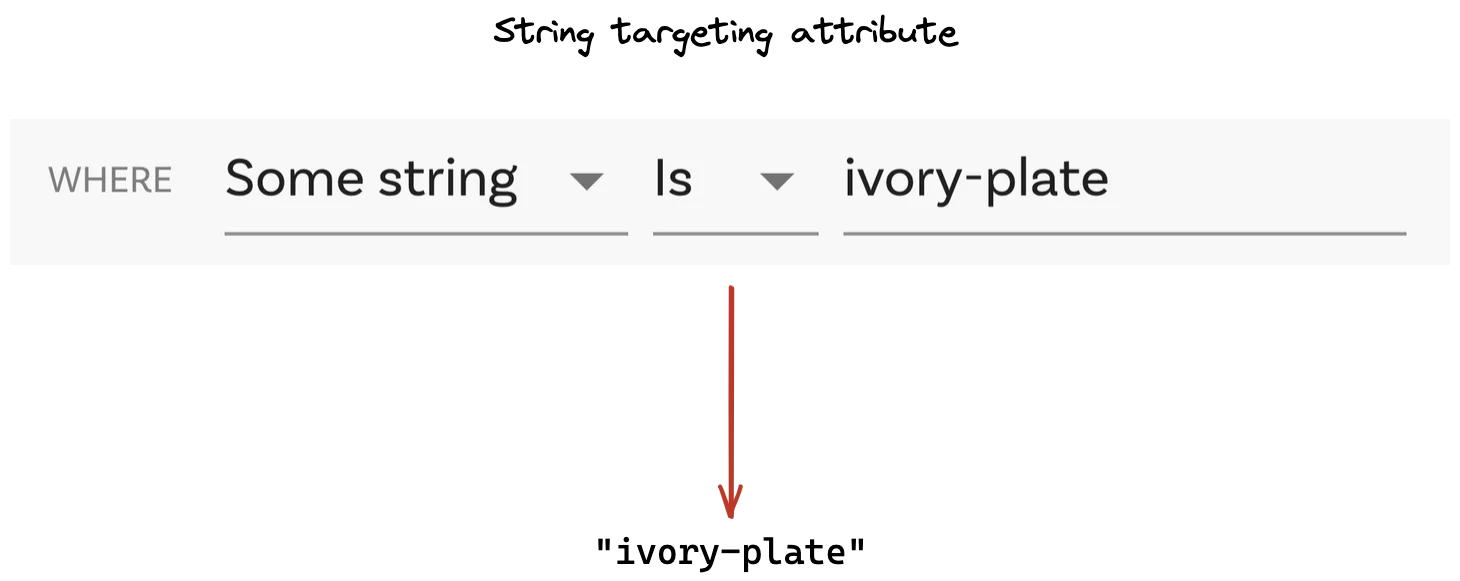
custom types generally provide editors with rich user interfaces, allowing users to provide complex inputs such as colors, forms, or products.
For example, the Shopify plugin's Shopify product handle custom type provides a searchable menu for selecting a product from a Shopify store. The editor stores the product's Shopify handle as the value.
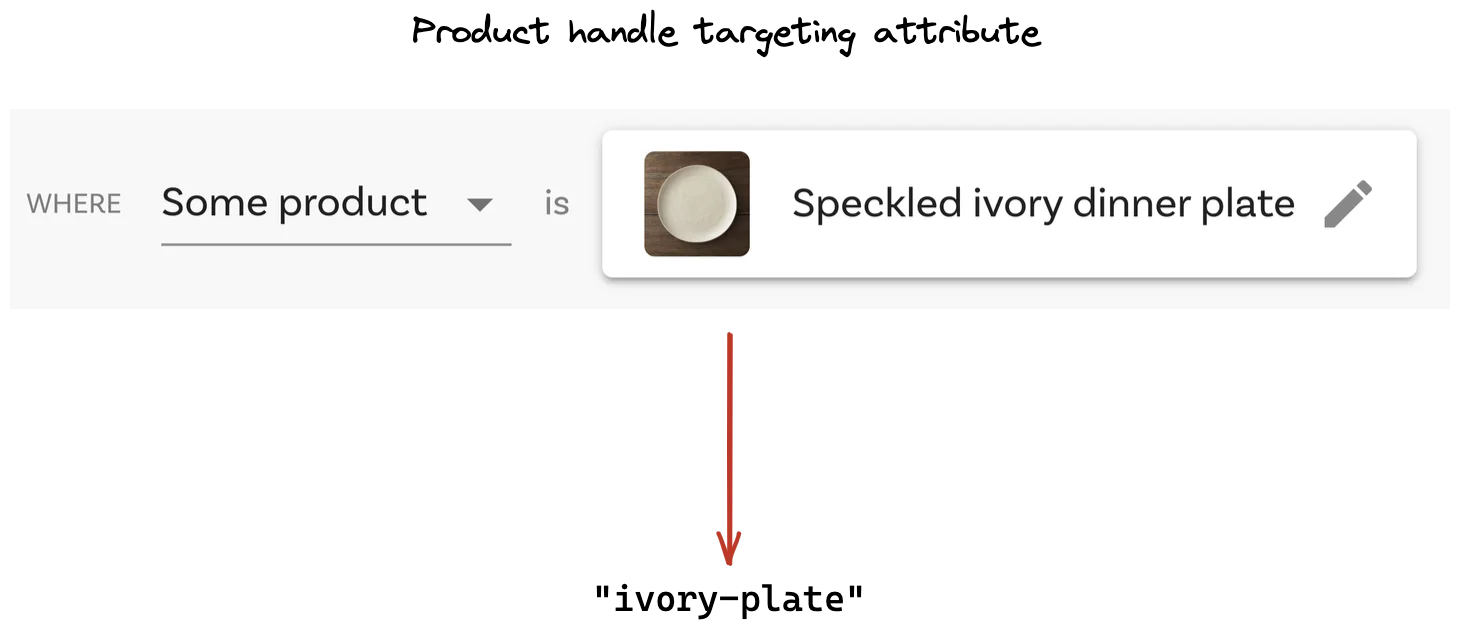
The same plugin also provides a Shopify product custom type. Despite providing the same editor user interface for selecting a product, it stores the selected product using its Shopify ID.
Targeting Cheatsheet
Creating your own custom targeting attributes can help you target specific segments of your site visitors.
Creating the custom attribute
- In Account Settings, click on the pencil next to Custom Targeting Attributes.
- Click the + New Target Attribute button.
- Name your attribute and choose a Type.
- Click the Save button.
Using the new attribute in the content entry
- Open a content entry.
- Click the targeting icon at the top of the UI.
- Select your custom targeting attribute under Where and select the value.
Examples of custom targeting attributes
When you create custom targeting attributes, you can specify the attribute you need as well as specify the type.
Example Attribute - isLoggedIn
- In Account Settings, create
isLoggedInwith a type ofBoolean
- In the content entry's Targeting dialogue, choose Is logged in and set the toggle on for
trueor off forfalse:
- in your code, use:
builder.setUserAttributes({
    isLoggedIn: true
});
Using Builder with Customer Data Platforms
Customer Data Platforms (CDP) help you track and identify user characteristics and group them into Traits, Personas, and Audiences.
Step 1: Add a custom targeting attribute to Builder
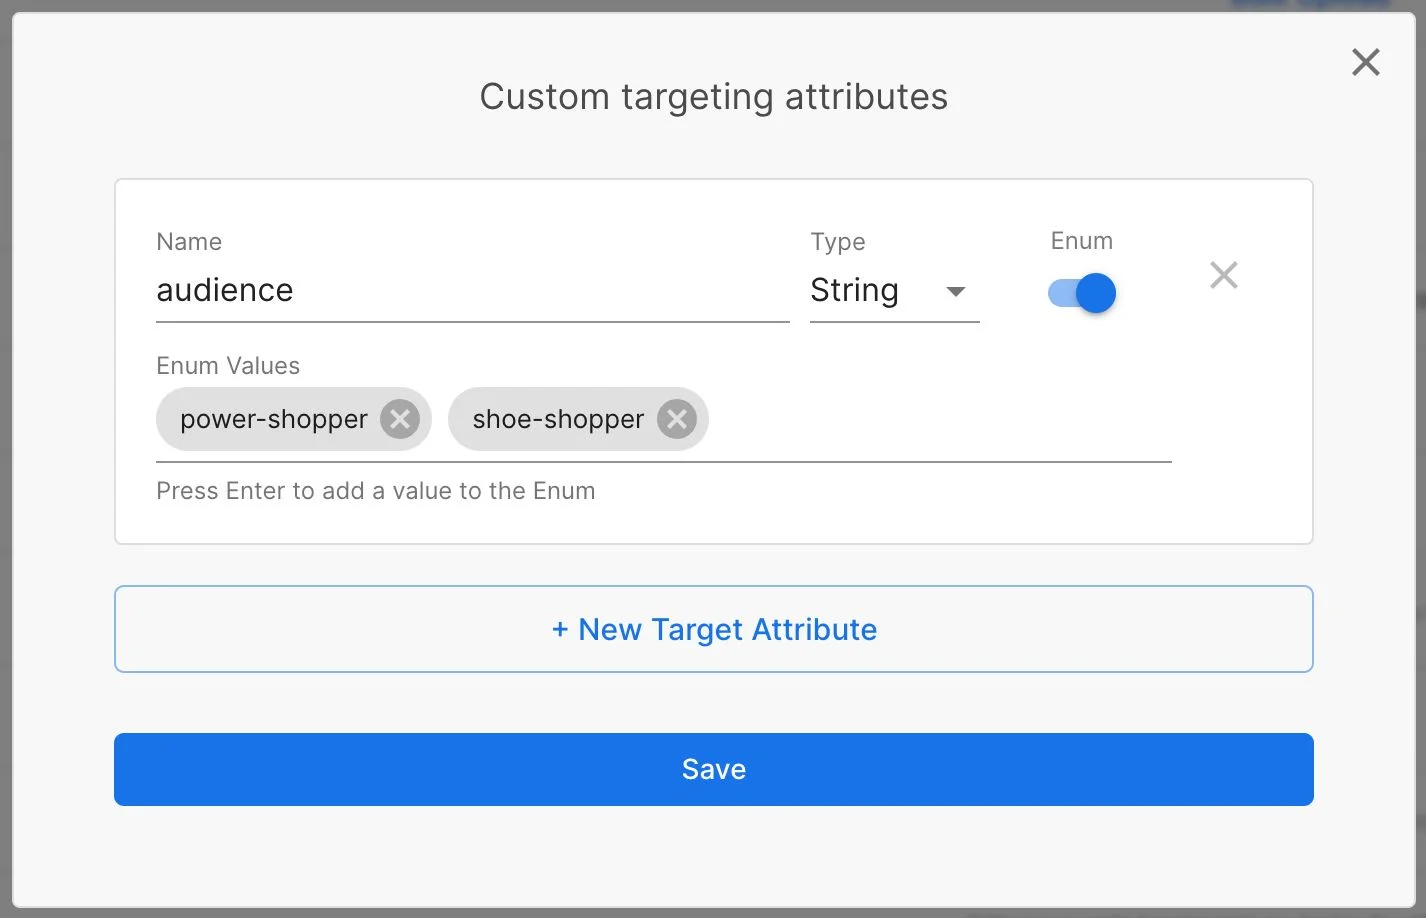
You can personalize Builder content based on various attributes. For example, to target content based on the current user audience type, define a custom targeting attribute for audience:
- Go to Account Settings.
- Click the Pencil icon next to Custom Targeting Attributes.
- Click +New Target Attribute
- Enter a name such as audience for Name.
- Leave String as the Type.
- Click Save.
Step 2: Configure your code
Next, from your codebase, fetch the current user audience type and set it using Builder's SDK:
builder.get('your-model', {
// Before the Builder content is fetched, set up segment
// alternatively, Builder also accepts the targeting
// attribute as a query param for direct API calls
 const audienceSegment = await myCustomCDP.identify({ user: currentUser.id })

// fetch corresponding content to the targeted audience
 builder.setUserAttribute({ audience: audienceSegment.name })
Now that you have set up your host to send the user's audience type, you can target content specifically to any of the audience types defined in your CDP.